Saturday, December 31, 2016

Carried Away

Up! Up! and away!  Let Sale-A-Bration and Occasions begin!  That's right, I have your catalogs and some card samples made for you!  We have to get together soon.  The  Cute paper you see can be yours FREE!  Ask me how: www.kris.stampinup.net
To make this card you will need: 

Lift Me Up Stamp set
4   1 3/4" squares of the Free Carried Away paper
1   2 3/4" square of whisper white
1   5 1/2" X  81/2" Mint Macaron
1 scrap of Watermelon wonder
Triple Banner Punch
Gold Sequin Trim

Get carried away with this fun set!


Thursday, December 29, 2016

Dragonfly Dreams

Dragonflies are my favorite insect.  I have one tattooed on my shoulder and own many pieces of jewelry that depict them.  To me, the dragonfly represents light and joy.  
I stamped the detailed dragonfly image on velum and then added color with the write and stamp markers.  I used the Stamping' Up! Multipurpose Liquid glue and Stamping' Sponges to adhere the velum to a piece of whisper white card stock.  The finishing touch is the delicate Lace Doily available in the Stamping' Up! Occasions Catalog.  Don't have yours yet?  Contact me, right away!
This beauty is the image in the Dragonfly Dreams set.  It includes a two step dragonfly and bumble bee.  Detailed Dragonfly thinly set will bring the insects to life on your projects!


Wednesday, December 28, 2016

Lift Me Up

Stamping' Up! nailed it with these hot air balloons.  Just think of all the people you can create projects for with  the Lift Me Up Stamp Set and Up & Away Thinlits!  Just pick you favorite color combinations and you are up, up and away on your way!  Get yours between Jan. 4 and May 31st and you can pick a Free item from the SALE-A BRATION catalog!  Contact me today for your bundle: www.kris.stampinup.net


Tuesday, December 27, 2016

So Detailed

I'm falling in love with the Falling In Love Suite Stamping' Up! showcases in the Occasions Catalog. Look at the bokeh paper and the delicate flowers in the So Detailed Thinlits. The Very Vanilla 1/4" Satin Ribbon is the only other thing needed to tie this card up!  What a gorgeous wedding, anniversary, or birthday card!  Get your supplies today with me www.kris.stampinup.net


Thursday, November 24, 2016

Black Friday Savings

Interested in some amazing deals this shopping weekend?
Black Friday and Saturday:
Shop between 4AM-6AM Friday Morning and save 20%
Shop between 6:01AM-8AM Friday Morning and save 15%
Shop between Friday at 8:01AM - 11:30PM Saturday and save 10%

  
Simply email or text me your order (include your name, phone, mailing address, and email address) and to provide the appropriate time stamp!
I will contact you to confirm your order and collect payment info.


Thanks for supporting my small business as a Stamping' Up! Demonstrator.

-- 
(¯`v´¯)♥
.`·.¸.·´
¸.·´¸.·´¨) ¸.·*..
(♥ ¸.·´ (¸.♥ ·´ .¸.♥ Kris
Live, Laugh, Love

Thursday, November 3, 2016

Candy Lane Designer Series Paper

If I was a gingerbread kid I'd move into this sweet little house!  Use the Pine Bough Texture Folder on a 2 1/2" x 4" piece of Crumb Cake paper.  Adhere it with some snail adhesive  on to another piece of  81/2" x 41/4" of Crumb Cake folded in half.  I cut the little house out of the Candy Cane Lane Designer Paper (Don't miss out on getting yours FREE during the Buy 3 get 1 Free until the end of the month) and added it to Real Read (3 1/2"x3") and Whisper White (3"x 2 3/4") Cardstock.  The sweet sentiment comes from the Candy Cane Christmas stamp set.  Just think how easy it would be to send these out for your Christmas cards!  www.kris.stampinup.net


Wednesday, November 2, 2016

Starlight

Nothing says Christmas better then snowflakes!  This delicate card is simple and delicate with a touch of glitter!

Supply list for this card: 
Starlight Thinlits, Cheerful Tags, Delicate White Doilies, Gold Glimmer, This Christmas Designer Paper, Fabulous Foil Designer Acetate, Whisper White, Real Red, and Basic Black.  


Wednesday, October 26, 2016

Merry Mice

This Trio of Mice in the Merry Mice Stamp set put a smile on my face.  As a little girl I had a little mouse that  I took everywhere.  Every year my mom gives me a little mouse Christmas ornament for my tree. Needless to say I love this set!  I paired it with the Holly Texture Folder and Tags and Label Thinlits to create a card just for my mom for Christmas!  Merry Christmouse to ALL!  www.kris.stampinup.net


Monday, October 24, 2016

Halloween Cookie Cutter

I've got my Halloween  cards all "wrapped" up with this little mummy! Using the coordinating Halloween Night Speciality Paper and washi tape you can come up with countless (insert  the vampire stamp here) combinations.  Don't forget to get the punch to cut out the scarecrow and the skeleton too!  www.kris.stampinup.net


Saturday, October 22, 2016

Buy 3 Get 1 Free

Now is the time to stock up on paper!  There's still time to get your favorites, until the end of October.  www.kris.stampinup.net

Lovely As A Tree

Simple and Elegant! The two words I would use to describe this cards! I used Always Artichoke cardstock to emboss the Woodland  Textured folder.  Then I stamped Lovely As A Tree with versa mark and  the copper embossing powder.  The final step was to mount the images on Copper Foil Paper and add some Copper Metallic Thread  Contact me to get the supplies you need for this and other projects: www.kris.stampinup.net

Tuesday, October 11, 2016

Merriest Wishes


I'm shouting with joy over this beautiful bundle!  There are seven different dies and eleven different stamps.  Add the gold foil paper and embossing powder and the Pine Bough Texture folder will have fabulous ornaments hanging.  Start your Christmas shopping early, www.kris.stampinup.net

Monday, October 10, 2016

Paisleys & Posies

I am "WOWed" by the Paisleys & Poises possibilities! Pair the stamp set up with the thinlits and embossing folder and the combinations are endless!  And add a touch of copper with embossing powder and foil paper and you have upped the WOW factor to a 10!  Get yours nowwww.kris.stampinup.net

Thursday, October 6, 2016

Stamping' Up! Christmas Stocking

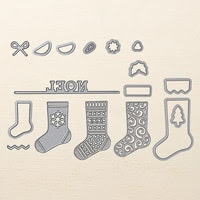
I'm Making my list and checking it twice.  Here is what you will need to get your stocking filled with the things you need for making this card: Warmth & Cheer Designer Series Paper,  Christmas Stocking Thinlits,  and Holly Texture Embossing Folder.  Ask Santa to get your stocking stuffed with a little help from me!  www.kris.stampinup.net


Wednesday, October 5, 2016

Warmth & Cheer

Warmth & Cheer is as simple as wrapping up this cute card.  Use the Designer Series Paper to cut 1" squares and mount them on Cherry Cobbler 1 1/2"  square and wrap them up with Gold 1/4" Natural Trim Ribbon and Cherry Cobbler Silky Taffeta Ribbon.  Use the Festive Textured Embossing Folder on Garden Green Paper and you are ready to mount it on the Cherry Cobbler card base!  Get your supplies here: www.kris.stampinup.net


Tuesday, October 4, 2016

Peaceful Pines

The Peaceful Pines for creating this stunning Christmas card.  Use the Peaceful Pines stamp set {Stamped in Old Olive) paired with the Perfect Pines Thinlits and you will be on your way.  I started with a piece of Night of Navy card stock and embossed it with the Softly Falling folder.  Then using the layering circles on the Big Shot I cut out the center and stamped the sentiment using the Tin of Holiday Cheer Stamp.  Add a piece of Silver Glittering ribbon for that final detail and you're ready to spend some Christmas Cheer!  www.kris.stampinup.net


BOGO on Paper Pumpkin

Who doesn't like a BOGO? There are still a few days left to get yours on the Paper Pumpkin!
Don't know what a Paper Pumpkin is? It is 30 minutes of ME time delivered straight to your door every month Everything you need is included to make a fun project or cards! 
Subscribe with the promo code BOGO and get the November kit free.

Sunday, October 2, 2016

Cookie Cutter Halloween

Time to Harvest up the smiles and hugs.  Send this card to someone and that is what you will get 
back!  This easy to make card will be something you will love to make more then one of.  Get the Cookie Cutter Halloween Stamp Set and Coordinating Punch, Halloween Night Designer Series Paper, Pumpkin Pie Glimmer Paper, and Tip Top Taupe Cardstock.


Saturday, October 1, 2016

Spooky Fun

 It's almost Halloween Night.  Time to get those cards done so you hand them out to those who need a treat.  This card is very quick and easy to put together.  Create four 1"x3" strips with the Halloween night Designer Series Paper.  Back on a piece of 4"x 31/2" Basic Black paper and put it all on a whisper White card base.  Add the finishing touches with a 4"x1/2" piece of Pumpkin Pie Glimmer paper and stamp the trio of pumpkins from the Spooky Fun Stamp set on the Layering Ovals and BOO!  You're treat of a card is ready!  BOO!

Thursday, September 29, 2016

Foxy Friend

This clever little critter is so much fun to make.  Grab some Watermelon ink and paper,  A Little Foxy Designer Series Paper and you have this foxy friend in the bag.  Just use the Scallop Toper Punch and you have a prefect thank you card (Rose Wonder "thank you").  www.kris.stampinup.net


Tuesday, September 27, 2016

Spooky Jars

Did you fall in love with Jars of Love?  Don't get spooked with this Mummy it is made to coordinate with the jars, along with some eye balls and candy corn.  Add the Halloween Night Washi Tape and Designer Series Paper and you're set to make some spooky cute cards.

Monday, September 26, 2016

Cookie Cutter Halloween

Scarecrows, Mummies, and Vampires! Oh My!!  This trio of friends will put a smile on any trick or treaters face! Paired with the Cookie cutter punch and you can create many different combinations.  Did you know that they have friends?  Yep Christmas Cookie Cutter friends are equally are sweet and cut out perfectly with the punch.  Come to my Spooky Night of fun on Oct. 14th at 5:15PM to  RSVP here or at www.kris.stampinup.net


Merry Mice & 5 FREE cards


Purchase this Merry Mouse stamp set, during the week of September 25-30, and I will send you the paper and accessories to make five cute cards for free!  www.kris.stampinup.net


Wednesday, September 21, 2016

Owl Builder Spinner Card

What has this owl's eyes all wiggly?  She is dizzy with excitement!  Build a spinner card with the Owl Builder punch and your scraps!.  To create the track for the owl to sit in, I used the Classic Label Punch.  I lined it up on the bottom of a piece of 3 3/4" x 5" piece of Affectionately Yours Designer Paper and punched twice.  Then create your owl.  on the back of the owl adhere a penny using Fast Fuse.  Use a dimensional to adhere a second penny to the first.  Slip the pennies between the track.  I found using dimentionals on the corners of the 3 3/4" x 5" allows the pennies more room to spin! What other things can you put a spin on?  Contact me and I'll share my ideas with you: www.kris.stampinup.net


Tuesday, September 20, 2016

Look out your window...  Are the trees this colorful?  If you live in MN we are starting to see the colors of fall kiss our trees.  But if you don't live here or some where with trees that change into brilliant yellow, oranges, and reds, get your self the Hearth and Home framelit (this window) and create the tree with Sheltering Tree.  Use the Fringe Scissors to cut up colorful confetti and keep it all in place with the Foam Adhesive Stripes and Window Sheets.  The best part is you don't have rake up these leave up.  Get your supplies by going to www.kris.stampinup.net


Monday, September 19, 2016

Basket of Wishes

I love the smell of homemade pie baking in the oven, the crunch of a fresh apple and the coolness of the fall air.  You can capture all this with Basket of Wishes Stamp set on the Layering Squares Framelits.  Look at all the combinations you can create!  Use the Woodgrain Texture folder to add dimension to your card.

www.kris.stampinup.net


Sunday, September 18, 2016

Foxy Friends Christmas

Let it snow! Let it snow... too early?  : )  It might be a little early to talk about snow but let me help you get a jump start on those Christmas cards.  Who wouldn't love getting these friendly little critters to wish them cheer?  I used the Foxy Friends stamp set and the Fox builder  punch to make these cute critters.  I went to one of my favorite winter friends to borrow their scarves, hats, and ear muffs, Snow Place ( the penguin and snowman were happy to share!)  To keep with the forest theme I used the Woodland Embossing folder for the background.  Add these friends to your collection by going to my web site, www.kris.stampinup.net


Saturday, September 17, 2016

Cookie Cutter Christmas

These cute cookies won't burn or crumble!  But they will help you send out delicious cards.  The Cookie Cutter stamp set has a gingerbread person, santa, Eskimo, and a teddy bear.  I used the Cookie Cutter punch to make a quick, hassle free cut and mounted my gingerbread boy on the Layering Circle Framelits.  The sweetness continues with the  Candy Cane Lane Designer Series Washi Tape and the red and white bakers twine.  Come make this sugary sweet card with me Christmas Take 1 
Friday, September 23rd 5:15 or Saturday 24th 10:30 AM 

5 designs per section, 5 cards per design = 25 cards per section $30 (Envelopes additional $5) per section. 


Thursday, September 15, 2016

Swirly Bird by Stampin'Up!

What do you get when you combine Peekaboo Peach and Sweet Sugarplum?  A beautiful card!  Add a swirly from the thinlits colloection and punch a Duet Banner punch and you have the finishing touch!  Plus you will be using the number one stamp and thinlits set  following the hottest trend that is happening in stamping right now.  Get yours today:www.kris.stampinup.net


Monday, September 12, 2016

Floral Phrases

Elegant, simply elegant.  And simple it is!  Using Night of Navy ink and Floral Phrases flowers stamp your own paper pattern add some Silver Satin ribbon.  Now pick your size of layering squares and finish off your card with the sentiment found in this set too! www.kris.stampinup.net


www.kris.stampinup.net

Saturday, September 10, 2016

Flourishing Phrases

Today,  I needed to make a handful of cards quickly.  The first stamp I thought of was my Flourish Phrases.  It is elegant and detailed. So I grabbed my paper cutter, Flirty Flamingo (11" x 4 1/4"),  Basic Black ( 5" x 4"), and Whisper White (4 3/4" x 3 3/4") paper.  I just needed my Basic Blank ink and Flirty Flamingo Stampin' & Write marker.  I added a Itty Bitty Punch butterfly with pearls and I was ready to create 6 cards in 20 minutes!  Create yours after you get your product from www.kris.stampnup.net

Monday, September 5, 2016

Sitting Here

Do you like to color?  Then this is a great stamp for you.  The bonus is the kitty, puppy, basket  and little throw pillows!  Create your own piece if serenity.  I used the grass in this set to create a boarder with Dapper Denim ink.  Do you know what set the sun is from?  Kinda Eclectic is the answer.  If you oder this set I'll throw in the Dapper Denim ink for free!  Contact me at www.kris.stampinup.net


Saturday, September 3, 2016

Flourishing Phrases

"Just A Note" to share my love for Stamping' Up products...
Use watermelon wonder paper and texture it with the Seaside folder to create the base for this card. Stamp the flourish  from Flourishing Phrases (this is a two box set because it is LOADED with great sentiments) in Wild Wasabi  ink and use your spritzer filled with daffodil delight ink to spray a 4 3/4" x 3" piece of Whisper White paper. Next color in the flowers and leaves  with your stampin' & write Wild Wasabi,  Daffodil Delight,  and Watermelon Wonder  markers. Create some details with thinlits from the Flourish and Birds & Blooms.  Get yours today www.kris.stampinup.net 


Sunday, August 28, 2016

Grateful Bunch


To create this card I used  4" x 5 1/4" piece of Garden Green, on top of Whisper White card base. I added a 1 1/2" x  5"  scrap of Affectionately Your Specialty Designer Series Paper,  and 2 1/2" x 5" of Whisper White.  Stamp the leaves of Grateful Buch in Garden Green ink and the three flowers on a scrap with Watermelon Wonder.  Use the coordinating Blossom Bunch punch to quickly punch our the flowers and adhere them with dimentionals."   The sentiment is from the Heartfelt Sympathy stamp  set.  Stamp it on a 2"x3" scrap of Whisper White and back that to a 2 1/4" x 3 1/4" of Garden Green.  This color combination and stamp and punch set are a sure win for creating beautiful cards!  Get yours today: www.kris.stampinup.net

Saturday, August 27, 2016

Stack A Stamp September Samples

Stamp A Stack September 10th 10:30-2:00
Stamp a stack is a new class that I will offer each month. Come and make 10 cards: 3 cards each of 3 different samples. That means you have 2 to give away and one to keep for yourself as a sample. And 1 bonus card with a new technique. All you need to do is RSVP www.kris.stampinup.net and I will have everything you need prepped and ready to go for you! Cost $20. Can't make it? I can mail it to you, just add postage!